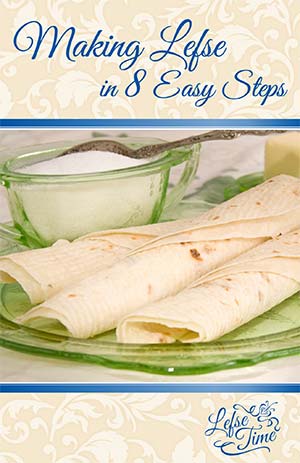
Follow this lefse recipe and these instructions to make perfect lefse!
These instructions are based on using our famous Aunt Charlotte’s lefse recipe but techniques can easily be applied to your favorite recipe too
Ingredients
Step 1: Boiling
Peel 2 to 2 ½ lbs of russet potatoes. Rinse and cut potatoes in half and then quarters. It’s important that your potato pieces are of similar size so they are all cooked through at the same time. Place potatoes into a large pot of salted water and boil until fork tender. (You should be able to pierce potatoes with a fork easily.)
Note: This will yield 4 cups of riced potatoes equaling 12 lefse rounds, you can easily double this recipe for a larger batch.
Note: We highly recommend using a good quality brand russet-burbank potato. Our favorite here at Lefse Time? Kitchen Kleen. Grown right here in Wisconsin!

To ensure your potatoes cook evenly, cut them into pieces that are roughly the same size, and place them in the salted water before you bring it to a boil.
Step 2: Ricing
When the potatoes are done boiling, drain into a large colander. Drain well and rice. Don’t waste a lot of time here, your potatoes need to be warm to melt the butter in the next step. To help keep your potatoes warm, rice them into the empty pot you used for boiling. Rice all your potatoes and then measure out 4 cups (lightly packed) into another large bowl. Note: Make your ricing a bit easier and only fill the ricer basket 1/2 to 2/3’s of the way full. And take it slow, a lot of pressure all at once and the potatoes will come out too fast and all over. They are very hot and can burn your skin.
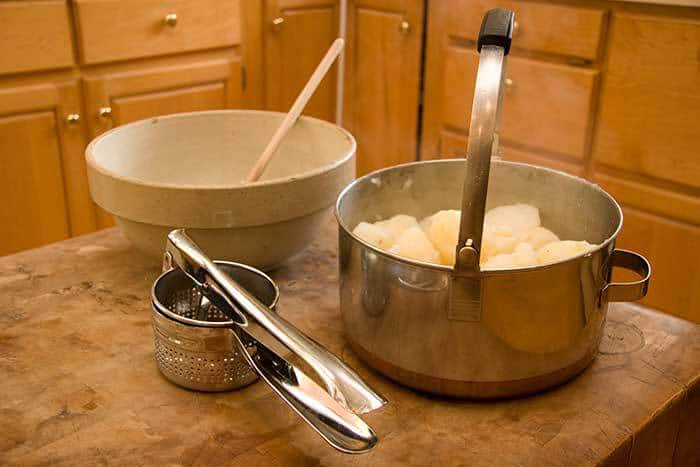
Drain the potatoes in a large colander then return them to the empty pot to avoid washing more dishes.

Rice the potatoes using a potato ricer. (Need a potato ricer? Visit our Products section.)
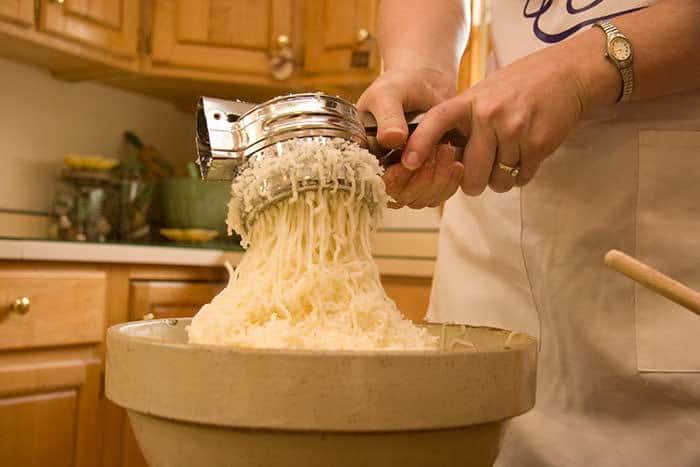
Try to work quickly when ricing potatoes–your potatoes need to be warm to melt butter in the next step.
Step 3: Cooling
To your 4 cups of riced potatoes, add 1/4 cup butter in pats so it melts in evenly. Stir a few times to get the butter mixed in well. Cover and refrigerate overnight. If you would like to cook the same day you can cover the potatoes with a towel and set aside on your countertop until they are completely cooled. Or to cool faster, place uncovered in refrigerator for 30 minutes, pull out and stir, refrigerate 30 minutes longer, stir. Keep repeating until cooled. Even faster? Use the freezer. Same process: freezer, stir, freezer, stir until cool.
Note: If you can, let the potatoes cool off a bit at room temp before covering. If they are still steaming hot, all that steam will condense on the lid and give you extra water.

Add pats of butter to your riced potatoes to melt, then set the bowl aside to cool completely.
Step 4: Mixing
To your cooled potatoes add the 1/2 cup whipping cream, 1 tsp salt, 2 tsp sugar and 1 ½ cups flour. If you have refrigerated overnight, break up the potatoes into small crumbles before adding the remaining ingredients. Once added, stir until most of the flour is worked in (loose crumbles). Then knead (like bread dough) 10 – 15 times. (Or more, some of us don’t have the strongest hands.) You can knead right in your mixing bowl. You should feel your dough come together into a smooth dough.
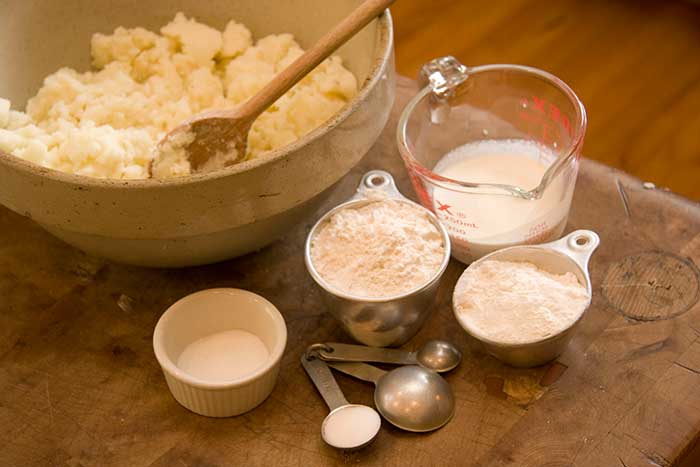
When your potatoes are cooled, mix in whipping cream, salt, sugar and flour.

Stir until all the flour is mixed in evenly.

Then knews (like bread dough) 10 times.
Step 5: Patties
Using a 1/3 cup measuring cup, scoop out 12 patties onto a tray or cookie sheet. Then shape each patty much like you would a hamburger patty – gently knead between your hands, roll into ball and press flat. It is very important that the edges of your patties are smooth with no cracks. Those small cracks will develop into bigger cracks as you roll. Set your patties aside to rest while you turn on your lefse grill and let it heat to 500 degrees.
Note: 1/3 cup patty will roll into a nice and thin 14 inch round. If you like thicker lefse roll only to 12 inches. If you like the thinness but prefer a smaller sheet a 1/4 cup patty rolls into a 12 inch round.
Note: Lefse Time kitchen uses a No.12 disher to speed up the scooping, it’s equivalent to 1/3 cup.

Use a measuring cup to make the patties fairly consistent in size.

To prevent cracking on the edges of your sheet when rolling, be sure the edges on your patties are nice and smooth.

Make all of your patties in advance to speed things along. Let them rest for 5 minutes before rolling.
Step 6: Rolling
To begin rolling, place your patty down at the center of your prepped pastry board. Gently roll forward and back using mostly the weight of the pin, only a very slight downward pressure so that your patty becomes a small oval. Then either rotate your board slightly or change your angle and roll forward and back. Continue rotating or switching your angles so that you keep your lefse round and of even thickness. Keep rolling until you have achieved the size of lefse you’d like. Preparation is the key to success with rolling. Round pastry boards are great for rolling lefse. They have size guides to indicate how large your sheets are and can be a great guide to round sheets. Prep your pastry board by spreading out about 1/4 cup of flour into a circle just a bit bigger than the sheet of lefse you intend to roll. Rub the flour in thoroughly to your pastry cloth. You will need to lightly rub in a bit of flour onto your pastry board between each sheet, paying special attention to the center as it tends to build up the most moisture and could cause sticking. A flour dredger is a very handy tool for that step. Prep your rolling pin by working flour into every groove of your pin. This can be sped up by rolling your pin directly into flour. For example, place a cup of flour onto a tray and roll your pin back and forth through the flour. Be sure to rub flour in on any missing spots and to rub in more flour between each lefse sheet. You can also use a rolling pin cover; it functions the same as a pastry cloth when prepped with enough flour.
Note: There is no rule that says your sheets have to be round, ovals taste just the same!

Preparation is the key to success with rolling lefse.
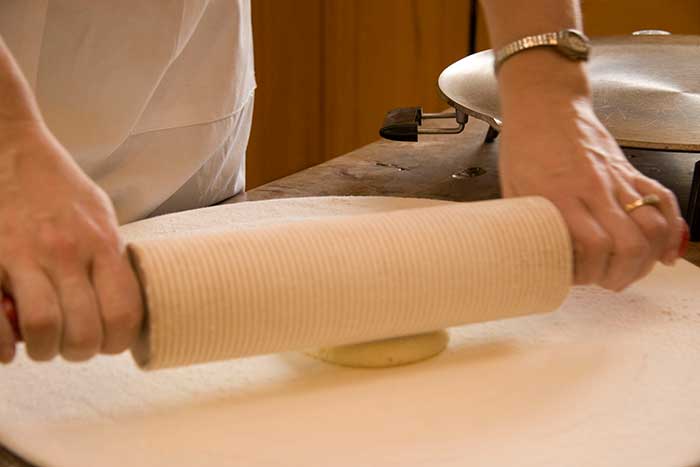
Rolling lefse is like rolling pie crust, start from the middle an work out.

Continue rotating or switching your angles so that you keep your lefse round and until you have achieved the size of lefse you’d like. Your lefse doesn’t need to be perfectly round.
Step 7: Transfer
Using a lefse turning stick, slide the stick under the lefse sheet (middle of sheet) making sure to keep the tip of the stick down. Lift gently from the board and move quickly to the lefse grill. Matching the edge of your lefse to the edge of the lefse grill, lay the lefse down and “unroll”. Again you will need to move quickly, and in one smooth motion. If you miss the grill and part of your lefse is hanging off, let it cook for 10-15 seconds, then using a hot pad, lay it on top of the cooking portion of lefse and gently pull the lefse that is hanging off onto the grill. Another method to transfer is to flip the edge of a sheet over the stick and roll in a couple turns and then lift up, again match your lefse to the grill, lay down and unroll.

Lift from the middle slowly for transfer to the lefse grill.
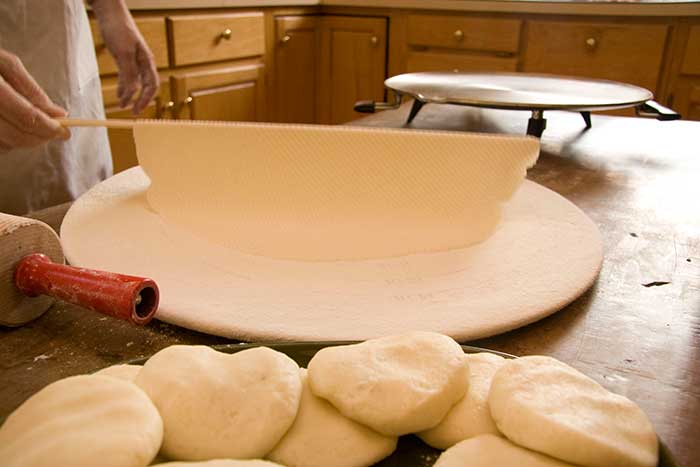
Lift cautiously to avoid spoiling your hard rolling efforts.

When transferring lefse to the grill be sure to move quickly for a nice even cook.
Step 8: Cooking
Cook the first side 30 seconds, give or take. The surest way to know if your lefse is ready to flip is to watch for cues. Your sheet should bubble up and when you peek under the edge there should be light golden brown spots. Then run your lefse stick down the middle, lift and turn over using the same method mentioned in step 7. Cook the second side until you see the same signs. The second side will cook considerably faster than the first side as the sheet has been heated through. From there simply transfer your lefse to lefse cozies or towel (do not use towels laundered with scents). Wipe off excess flour on your lefse grill with a dry cloth between each sheet to avoid burnt flour on your sheets. Let about 10 to 12 sheets stack, cover with a cozy or towel, then set them aside to cool. If you see that your sheets have a bit too much flour, wait until cooled and dust off. When lefse is completely cooled, package as desired.

Cook the first side for about 30 seconds.

Lefse is ready to flip when you peek under the edge and see light golden brown spots.

When the lefse is cooked, transfer it to a lefse cozy or a nice clean towel.
When your lefse is completely cooled, fold in half, then half again and store in zip-top freezer bags. They will keep in the freezer for 6 months or more.

Stack 10-12 lefse sheets on a cozy or towel, then set them aside to cool.

When the lefse is completely cooled, fold it in half, then half again.

Lefse will store in the freezer for 6 months or more.
Of course once you’ve cooked all your patties all that’s left is clean up and enjoying your very fresh, very yummy lefse. I love to eat it just plain as can be when it’s still a little warm. YUM!

